Activating Teams Recording with GuardREC® Compliance
Follow these sequential steps to activate Teams recording with GuardREC® Compliance successfully.
The PowerShell commands must be executed by your Teams Tenant administrator.
Step 1: Grant admin consent to GuardREC Teams Recording Bot
The recording bot makes use of API calls that require various permissions from your Teams tenant.
Use the following link to grant these permissions: https://login.microsoftonline.com/common/adminconsent?client_id=2ef45885-7d8e-4681-b34f-ff33717461cb&state=42&redirect_uri=https://www.guardrec.com
The following permissions in your Teams tenant are required to enable voice recording:
«Access media streams in a call as an app» and «Join group calls and meetings as an app». These permissions provide the BOT access to calls and fetch the audio.
«Read all call records». This permission provides the BOT access to call metadata. This is also used for QoS to match call records and recordings, to verify recording success and detect potential errors.
«Read all users' full profiles». This permission is used to fetch the user's email address, and to associate recordings with correcting users in guardREC® Compliance.
The permissions can be revoked at any time.
Step 2: Install the Microsoft Teams PowerShell Module
Follow these steps to install the Microsoft Teams PowerShell Module: https://docs.microsoft.com/en-us/microsoftteams/teams-powershell-install.
Step 3: Create Recording Policy
It may take up to 24 hours for the recording policy to become active.
Use the following Powershell commands to create the recording policy:
Import-Module MicrosoftTeamsConnect-MicrosoftTeams# Replace guardrec.com with your domain
$upn = "teams-recorder-grc@guardrec.com"New-CsOnlineApplicationInstance `
-UserPrincipalName $upn `
-DisplayName "GRC Recording Bot" `
-ApplicationId 2ef45885-7d8e-4681-b34f-ff33717461cb$objectId = Get-CsOnlineApplicationInstance `
| Where-Object ApplicationId -eq 2ef45885-7d8e-4681-b34f-ff33717461cb `
| Select -ExpandProperty ObjectId Sync-CsOnlineApplicationInstance -ObjectId $objectIdNew-CsTeamsComplianceRecordingPolicy `
-Enabled $true `
-Description "Record calls using guardREC Teams Recording Bot" `
guardrec-recordingSet-CsTeamsComplianceRecordingPolicy `
-Identity guardrec-recording `
-ComplianceRecordingApplications `
@(New-CsTeamsComplianceRecordingApplication -Parent guardrec-recording -Id $objectId) Step 4: Create Security Group and add recorded users to the group
A security group is used to identify the users whose calls shall be recorded.
The Security Group name is case-sensitive, so please make sure to enter both lower-case and upper-case letters exactly as they appear below.
Create the following security group: guardREC.Teams.Calls.yourcompanyname (Ensure to replace yourcompanyname with your company name. This name must only contain letters (A-Z) and/or numbers (0-9)).
Add recorded users as members of this group.
Copy the “Object Id” to powershell (Screenshot ->
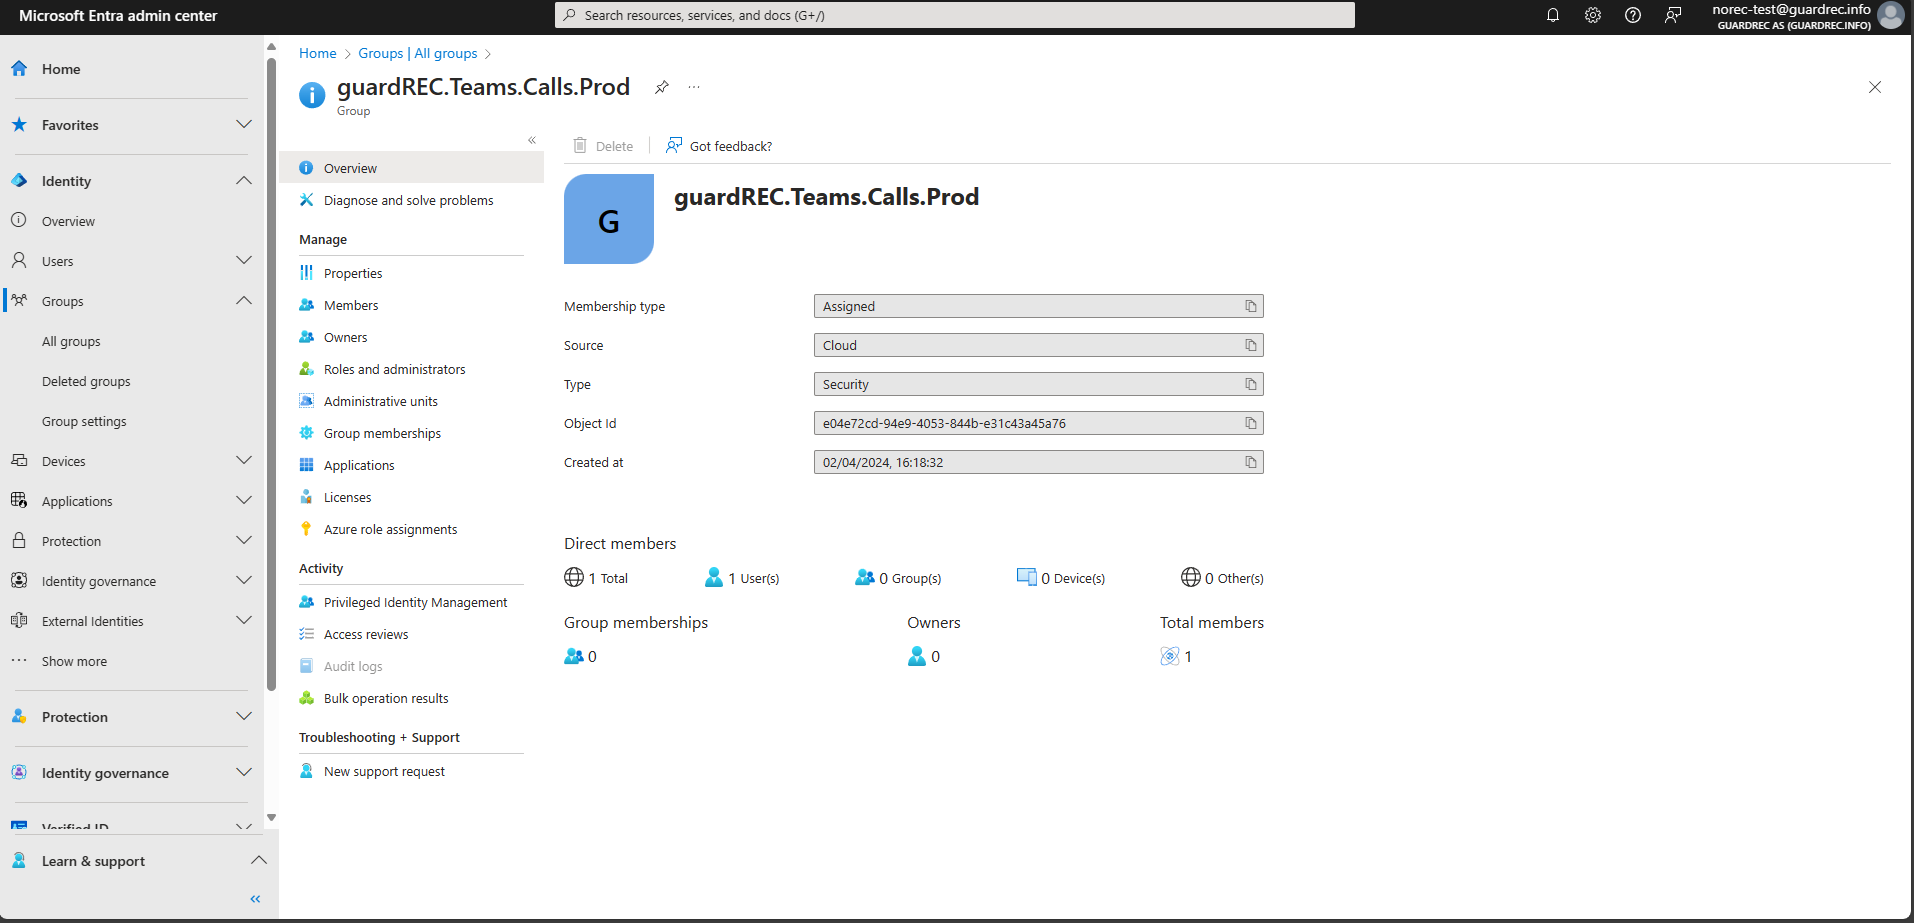 ):
):
$groupId = "paste here"For documentation on managing groups and including members, please refer to Microsoft's websites: How to manage groups - Microsoft Learn.
Step 5: Assign the Recording Policy to security group
The policy should exclusively be executed on users specifically designated for recording with GuardREC® Compliance.
Use the following PowerShell commands to assign the recording policy to the security group:
In Azure Active Directory go to Groups and create a Recording group. Use the Object ID of the Group in the Powershell command below. Assign a single “Test” user to ensure the policy is working as expected before adding all recorded users to the group.
New-CsGroupPolicyAssignment `
-GroupId $groupId `
-PolicyType TeamsComplianceRecordingPolicy `
-PolicyName guardrec-recording `
-Rank 1
Get Group Policy – Verify if group policy was assigned correctly
Get-CsGroupPolicyAssignment -PolicyType TeamsComplianceRecordingPolicySync the Application Instance to confirm all changes are applied.
Sync-CsOnlineApplicationInstance -ObjectId $objectIdStep 6: Setup Verification and Recording Tests
Initiate a few test calls to one or more of the users who have now been activated for recording. You should see a banner in Teams during these calls that reads, "Org policy for [Name] required recording this meeting. By attending, you consent to being recorded."

Please note that the activation of the recording policy could take up to 24 hours after creation and assignment. So, if the banner isn't visible immediately, don't worry - just give it some time and try again later.
Step 7: Informing GuardREC to Complete Setup
GuardREC needs the following details to complete the setup:
Your Teams tenant domain
Name of the Security Group created in Step 4.
Name and email addresses of users with Recording Policy
Once the banner becomes visible during the test calls, please reach out to your GuardREC account manager and provide:
Your Teams tenant domain
Name of the security group created in Step 4.
Name and email addresses of users with Recording Policy.
Once we have received the information above, we'll then finalize the setup with your GuardREC® Compliance account.
As soon as we've completed the setup on our end, we'll promptly notify you. After the setup is complete and the recordings are linked to your GuardREC® Compliance account, you can start expecting to see these recordings populate within GuardREC® Compliance.
Step 8 (optional): Disable audio notification for PSTN calls
By default, audio notification is activated for PSTN calls in Teams to notify participants of recording.
You can disable this notification by running the following PowerShell command:
Set-CsTeamsComplianceRecordingPolicy `
-Identity guardrec-recording `
-DisableComplianceRecordingAudioNotificationForCalls `
$true